Thermal Printer Setup
Setting up your thermal label printer is key part of being able to print shipping labels.
- Load the printer labels in to the printer
- Plug in the printer to the power socket
- Connect the printer to your computer using the USB cable provided
- Turn the printer on
Once you have completed these steps, you will need to install the relevant printer drivers.
You may need Administrator access to install the printer drivers on your PC. Please contact your internal IT support team for more information.
If you are using a Citizen or TSC thermal printer, please click on the following link to download the printer drivers.
If a TSC or Citizen thermal printer is not being used, please download and install the relevant printer drivers from the manufacturers website.
Once the printer has been successfully installed, the required printer must be set up within MyDPD.
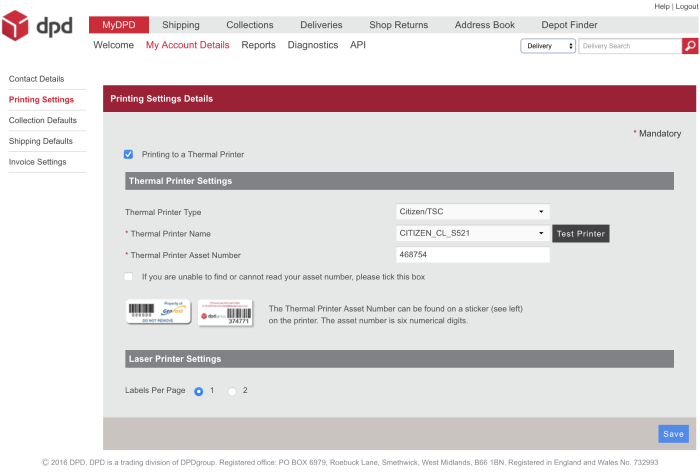
Navigate to My Account Details within the MyDPD homepage.

On the left side of the application, click on Printing Settings.

To use a thermal printer, tick the Printing to a Thermal Printer check box.
Thermal Printer Type - The brand or printer code used to print a thermal label
Thermal Printer Name - The name of the printer as it is saved as on the PC.
Thermal Printer Asset Number - If the printer is provided by DPD, type in the six digit number from the front of the printer. If there isn't a six digit code, tick the box below the field.
Once you have completed this information, click on Save.
Thermal Printer Setup Videos
For more information please watch the thermal printer setup videos below.