
Imports
The Import facility is simply a bulk upload of shipment data from a host system directly into ship@ease to create and produce labels.
Use the Imports option on the Shipping tab to produce the following types of Imports:
- Shipment Import ~ Upload of shipment data for label production.
- Delivery Address Book ~ Upload of customer address data including return address data.
Upon completion of the Shipment Import process, the following file is available for creation from the Import section:
- Shipment Receipt ~ Produces a list of successful shipments create, including parcel and consignment details.
Cick the Shipping tab then select Imports from the sub-menu.
On the import screen you will see the drop down option for File Definition.

Setting up the File Layout
The Data File Field Order section contains the mandatory fields ~ additional fields can be added from the Available Fields section by one of three ways:
- Add All This will copy all of the Available fields into the Data File Field Order section to be added to the job import template.
- Add This allows individual fields to be added into the Data File Field Order section as required ~ Click on the required field and press the 'Add' button.
- Click and Drag Click and drag individual fields to be added into the Data File Field Order section as required.
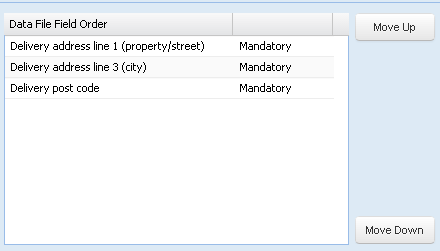
Amending Field Locations
The order of the selected fields can be amended.
Move Up or Move Down
Ā
- Click the required field and use the Move Up or Move Down buttons to relocate the field within the template, you can also click and drag the required field to relocate the field within the template.
Ā
Note - The fields need to be in the identical order as your import file.
Import Directory
Select the file location where ship@ease will extract/pick up the Import file that has been previously created containing the shipments, e.g. C:\Import
Import Extension
The Import Extension must = .csv
Field Delimiter
- Comma (,)
- Pipe (|)
- Colon (:)
- Semi-Colon (;)
- Tilde (~)
Inport Configuration file

As viewed in Notepad.

As viewed in Excel

Print Label on Import
Place a tick in this box if the labels are to be printed upon completion of the file import.
File Header Support
You have the option to ignore the first line on the import file when the line is Header Line, these will be the title names for each individual field, as our system will interpret the line as a shipment, however removing the first line will avoid any error from the system being generated incorrectly.
Is Enabled
Place a tick in this box to enable the automatic process of polling the import Directory to import the required files. This automatically poles at 3 second intervals.
Refer to the Shipment Review section for how to print these labels if you have not selected the Print label on import option.
 File Definition
Select via the drop-down options Shipment receipt.
The Data File Field Order section contains the mandatory fields ~ additional fields can be added from the Available Fields section by one of three ways:
- Add All >> ~ This will copy all of the Available fields into the Data File Field Order section to be added to the job import template.
- Add > ~ This allows individual fields to be added into the Data File Field Order section as required ~ Click on the required field and press the 'Add' button.
- Click and Drag ~ Click and drag individual fields to be added into the Data File Field Order section as required.
 Amending Field Locations
The order of the selected fields can be amended.
Move UpĀorĀMove Down
- Click the required field and use the Move Up or Move Down buttons to relocate the field within the template.
- You can also click and drag the required field to relocate the field within the template.
Export Directory
Select the file location where ship@ease will deposit the chosen file, e.g C:\Export
Export Extension
The Export Extension must equal four characters of your choice, e.g .csv
Field Delimiter
- Comma (,)
- Pipe (|)
- Colon (:)
- Semi-Colon (;)
- Tilde (~)
Auto Create File
A tick is required in this box to produce the report.
A comma-separated, CSV file is required to be created prior to the commencement of the instructions below and stored in a specific file location to be referred to further along in the Delivery Address Book import process in ship@ease.
Setting up the File Layout
The Data File Field Order section contains theĀmandatoryĀfields ~ additional fields can be added from the Available Fields section by one of three ways:
- Add All >>Ā~ This will copy all of the Available fields into the Data File Field Order section to be added to the job import template.
- Add >Ā~ This allows individual fields to be added into the Data File Field Order section as required ~ Click on the required field and press the 'Add' button.
- Click and DragĀ~ Click and drag individual fields to be added into the Data File Field Order section as required.
Amending Field Locations
The order of the selected fields can be amended.
Move UpĀorĀMove Down
- Click the required field and use theĀMove UpĀorĀMove Downbuttons to relocate the field within the template.
- You can also click and drag the required field to relocate the field within the template.
Export Directory
Select the file location where ship@ease will deposit the chosen file, e.g C:\Export
Export Extension
The Export Extension must equal four characters of your choice, e.g .csv
Field Delimiter
- Comma (,)
- Pipe (|)
- Colon (:)
- Semi-Colon (;)
- Tilde (~)
Auto Create File
A tick is required in this box to produce the report.